08 August 2015

More bread tag robots!

I have tried some more bread tag robots, this time with some proper tools! It's amazing how much easier it is to work when you have the right tool for the job. I had seen a pack of 5 assorted jewellery tools at Spotlight complete in a zip up pouch for $15, but I much preferred paying 30% less with a discount voucher..... ;)

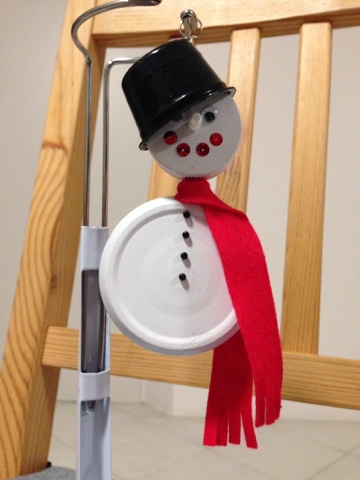
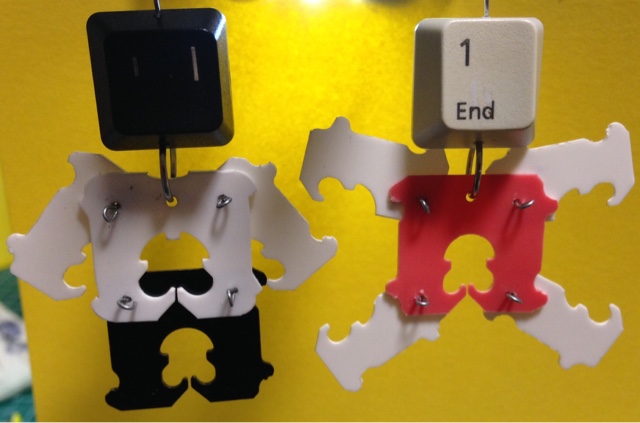
Anyway, buying head pins was expensive, so I bought a roll of beading wire instead, and made them with loops. I think they give a bit of interest to the front, so adding the heart may be too much?


I also tried using the one that I spray painted, and it looks pretty good an breaks up all the whiteness.


So I also thought I would try the loose leg style, and I think I like it more this time around, as they are longer, and the shoulders aren't so pointy. Basically, I just cut 2 tags in half, but the leg ones need to be trimmed a bit around the join and flipped around to make feet. 


The holes are drilled with the smalles bit I have, except for the neck, as the jump ring is thicker so won't go through. Mo measuring, just eyeball and drill. Simple!! 


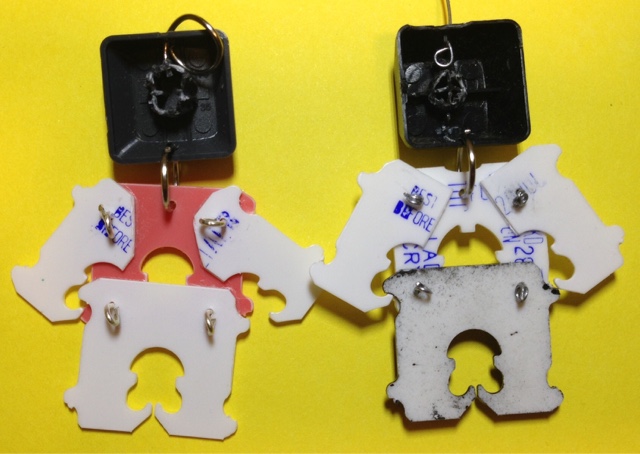
Not a bad result, if I do say so myself :) And much more secure than the head pins, so the joints are tighter....


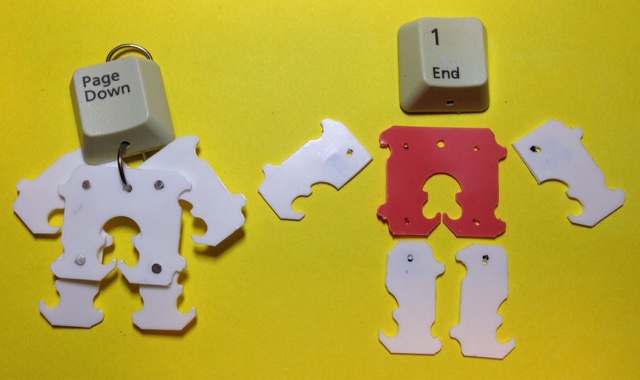
They don't look so great from the back, though, so I will consider painting them, at least in primer, to hide the dates that are printed on them. That will give a much nicer look to the finished pieces. Not sure how to fully remove the inside of the key, either. It's such a small space to work with, and you can't get cutters all the way down to the base. I wonder if I should just keep the shank attached, rather than mangle up the back trying to remove it?


Anyway, I will definitely be painting some more tags as soon as the weather calms down a bit, but what to use for the hanging loop? I thought an earring hook, or maybe a keyring? Not sure it would survive that kind of abuse, as they are quite delicate. More thought required on that.....

01 August 2015

Mini Halloween baskets

Many months ago, we were lucky enough to receive a gift basket of local yoghurt. Delicious they were, too. However, they also came in the cutest little containers. 


A bit of eucalyptus oil and some elbow grease, and the print came right off! The handle pops off, too... Once it was all gone, I painted with the plastic primer, and put a layer of black spray paint on top. Loved the finish, so just added a simple sticker, to break it up. 


This, however, was the end of my good luck :( The next ones, the primer went on great, but for whatever reason, the colour layer would bubble up, taking me back to step one. Take off all the paint, prime, and colour again. Happens again!! What is going on??? I tried one last time, paying very close attention to cleaning and dusting them down. Used some cleaning alcohol, just to be sure. Finally, success! So frustrating!

Anyway, I tried something different with the big one, trying a stencil. Not too successful, but with a bit of pen work, I saved it (kinda). Sealed with matte Mod Podge, to keep the finish.


The other one I thought I might paint freehand. And what better to paint than dripping blood? Good old Google was able to give me some ideas, however my red paint, for some reason, was a bit gluggy, so I went over it a couple of times to try and smooth it out. Average success, but with the gloss sealer over the top, it looks better. Don't know where it's lid has gone, but it will be reunited when located ;)

I think they turned out ok, in the end...


Size wise, the little ones are perfect for dolls, such as Baby Face. 


The bigger one is more CPK size...


If I get more, I will definitely make some more! But make sure to clean them properly before spray painting them or it could become an enormous headache....

More Christmas recycling!

I'm on a recycled Christmas blitz! All the bits and pieces I have been hoarding are finally finding a use!!

Cue the unfinished items with big plans (lucky I still have a couple of months up my sleeve).

Just had the bathroom renovated, so no need to a shower curtain anymore. What do I do with all the rings? So far, a mini wreath, but I my also thinking dream catcher? This one is a bit of  red bias binding and some white ribbon, with a bell and a bow to top it off. I haven't finished this one yet, but it is very close. 


Next is this snowman variation. Before I painted the last one, I thought about glueing on some fleece. Not too successful, as you can see the red poking though, but once there is a face and buttons on, it should be ok. I can't remember what I used for the head, but the body is a milk bottle top. Maybe it's a coke bottle top? Not sure.....


Last year I made a gift out of cardboard and felt, I may make some more, but make them smaller. Maybe houses? Will have to see what happens...


So much inspiration at the moment, but not so much motivation. I'm gonna blame winter.... ;)

Christmas crafting, recycled style...

A cute little Snowman popped up on my FB feed using bottle tops. How could I resist giving it a go?? 
http://www.oneartsymama.com/2012/11/bottle-cap-snowman-ornaments.html

I had already started saving milk bottle tops for someone (can't remember now who?) and thought I could substitute with these instead. To get some variation in size, I used a milk bottle tops and the lid from a pasta sauce, but I also tried a coke bottle top. Another item I have been salvaging from the recycle bin are the used coffee pods, and thought this would make an awesome hat ;)

So, here is my interpretation of the Snowman. His head is a milk bottle top and his body is a lid from a glass jar. I painted it with my white spray sealer, first on the outside only, but went back and did the inside as well. I sealed it with some Mod Podge, and doubled up using it as the glue. I used some googly eyes and a faulty bead for his nose, some sequins for his mouth. Some beads make his buttons, although they look a little small... His scarf is made from felt, but I will raid my ribbon box next time.....


As a test, he isn't too bad. A few notes to remember, spray the backs FIRST, then the front, to stop the front being damaged. The head pin was causing the base to spin backwards when held up, so I used a bead to separate it a little from the rim of the lid, and used another between the "body" and "head" to give somewhere for the scarf to sit. I could use wire, to make it a bit softer? The hat has been deliberately placed at an angle, but could be straight on, if required. I could also glue two lids back-to-back, to give a more 3D effect, or even just his head?? May try that next time.... ;)