30 April 2012

Even more mini bags!!

Oohhh!! These are so much FUN!!

Here are 2 more from today...

The brown one is softer than the others so far, and I managed to forget one of the stitching lines and made the buttonhole far too big!! Turned out to my advantage, though, because I could use a far bigger button to brilliant effect...

The other is straight vinyl with curtain fabric inside. Seems it doesn't really matter what fabric I use, they all just seem to work out fine!!

I took them to Doll Club yesterday, and they are all keen to buy one, so now I have 4 weeks to make as many as possible to sell at Sales Day. I have so much fabric, I don't think I'll run out of colours or textures any time soon!

28 April 2012

Mr Bean's bear..

My work is turning 21, and the request was made on Tuesday for a Mr Bean style bear to be presented to my boss on Friday!! Yikes!!! That doesn't leave much time, especially since Wednesday was a holiday (ANZAC Day)! How could I source this very specific item in 2 days????

Solution?? Make one!!

Problem 1? I can't knit. Problem 2?Time. I really only had the public holiday to complete it. Problem 3?Pattern. Searched the web for a fabric version but had zero success.

Brainwave!! Use felt! I knew that the markets would be open on the public holiday and the fabulous craft shop had felt squares cheap. Just need a pattern....

I thought I could just make a flat bear shape and put the eyes on and be done, but I remembered I had a pattern for a mini felt bear... somewhere.. Searched high and low, and finally found it. Copied it, enlarged it... it's going to work!! I hope...

I'm not a big fan of hand sewing, but I knew it wouldn't work properly if I used the machine, so as soon as I got home from the markets, I got comfy on the couch and got to work. And here is how he turned out!!

(PS. He was a big hit!!)

25 April 2012

Western Power bear...

So the next contract I decided to dress from work was Western Power, although it could easily be anything like mining or mechanical, etc......

I used the same shirt pattern that seems to fit really well (see Accountant bear) but then attach it to a pair of trousers to make a kind of boiler suit. I took a diagram of an actual suit from work and used that as a guide to where to put the silver tape, colours, etc.

I had a literal laugh out loud moment as soon as I turned this outfit right side out. I thought it was HILARIOUS!! It turned out just as I had pictured in my head!!

Very few accessories to be added to this one, besides maybe a name tag and boots......


Tiny T-shirt...

In between bears and bags, I managed to make a T-shirt for a little TY Beanie Bopper called American Millie. I had put this off for ages since I don't enjoy sewing for tiny dolls and I was trying to replicate the original. Trying to find a really tiny American flag, in theory, was easy. In reality, not!

So, since we are having a Doll Sale in a couple of weeks, I thought I'd just get her into something decent.


Very simple square shirt with square sleeves. Found some fabric with a little fishy on it, and used fusible web to attach it. DONE!!


NEXT!!!!

23 April 2012

More mini bags of fun!!

A trio of  mini bags
Just made another mini bag, and taken some better shots for the future tute. It's a better contrast so you can see the stitching better.

This time I used a yellow vinyl on the outside and red upholstery velvet in the inside. Also made a couple of construction changes... Oh, and I added some chain handles!
vinyl outside, fur inside


Fur outside, vinyl inside
vinyl outside, red velvet inside
red velvet inside


22 April 2012

Bags of fun!!

Since I made the mini bag yesterday, I have had a couple of ideas that I wanted to play with today.

1. Remove the integrated handle because it's a bit thick.
2. Explore replacement handles out of chain or thinner vinyl strips.
3. Eyelets for "straps" attachment to bag.
4. Side wall changes
5. Try a variation in fabrics.

So, I removed the handle. Tick.
I modified the side wall, integrating a curved to piece to put in an eyelet to connect a chain or strap from. Tick.
I found some blue vinyl and some firm fur fabric (say that three times fast!!) and tried the same pattern in reverse, so one was fur inside, one outside. Worked! Tick!

Looking at how they turned out, the fur inside version could easily be a jewellery or coin purse as well as a doll bag accessory! Multi purpose! LOL!

Pics are pretty ordinary, but you get the idea! Still need a visit to the hardware to check out some chain, but couldn't wait!

It's hard to tell but the size is still the same 8cm wide, 5cm high and 2cm deep.....

Reversed vinyl, fur fabric

21 April 2012

Bear satchel...

So, accountant bear (affectionately named Doris!) came home this weekend for a couple of upgrades. Firstly, let me just say the girls at work LOVE her, and are frantically hunting around for accessories.... hence the upgrades!

A bright red flower was supplied as a brooch, plus a cute little bow for her hair. Now, she just needs shoes, glasses and a briefcase and she is complete!! I can't do shoes (although I DID try!) or glasses, but I had made a satchel in the past that was quite successful. I will write up a quick tutorial when I get on the big puter, since blogger for iPad doesn't allow for inserting pictures where you want them, it just dumps them all at the bottom... You hearing me, Blogger?? Rant over....

Anyway, here is the new and slightly improved Doris, the accounts department bear....


15 April 2012

Accountant Bear...

Request number 2 - add a bear for the Accounts Department...
Now, how stereotypical should I be?? Glasses, calculator, suit??? Yep, all of the above!!

Version 1 was not too successful. Bears are hard to dress, especially these ones with bulging legs and big tummies! I tried to make a collared jacket with plain shirt and scarf. Although the skirt was successful, the shirt and jacket was not. The sleeves were far too full at the top, and the body just plain the wrong shape! Plus the shirt was far too casual...

FAIL!!


Version 2 - jacket collar removed and collar added to undershirt. Much better result! Ended up using the original skirt, made a new jacket and shirt, plus added some "underthings" for modesty. I think I'll leave the accessories to them....

SUCCESS!!


(She is wearing some borrowed CPK lace up shoes.The girls can arrange to get their own...)


02 April 2012

New job, new challenge..


My new job is AWESOME!!

Not only am I out of the supermarket game, I get to work with FABRIC and CLOTHES all day!! Not so exciting to most people, however I feel like this is the perfect job for me!! Let me explain a little about what is involved...

We fit safety clothes and uniforms to agencies such as Police and Fire departments, electricity providers and Transport and prison workers. My main focus is the Fire Department, or FESA (Fire and Emergency Services Authority of WA), or in Aussie slang, the Fireys.

As part of my job, I fit individuals with their fire fighting gear. There are strict requirements as to the fitting of these garments, such as sleeve and leg lengths (we don't want them to burn their arms or legs!!) as well as allowing air flow around the body to keep them cool. I get to see a lot of different people every day, as well as talk to them on the phone, plus data entry and a little warehousing, too!

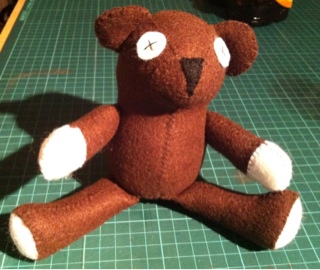
So, as I collect dolls and toys, and love to make doll clothes, the following challenge was issued - dress a bear like a Fire Fighter! Sounds easy, right?? Well, no.......

I do have an advantage, however. I can access the design drawings to use as a starting point. My intention was to create an exact replica in small scale, but as many will agree, this is NOT easy. I even bought miniature clips for the braces with the intention of using them but discovered very early on that this was not going to work. Too much bulk was created under the jacket and besides, Ted isn't going to need to get undressed very often, so I simplified a bit (read - a LOT!!). I was also going to use real reflective tape, but I couldn't find any by the metre, only full rolls, so I settled on a silver tape from the local hardware store cut to 2cm widths....


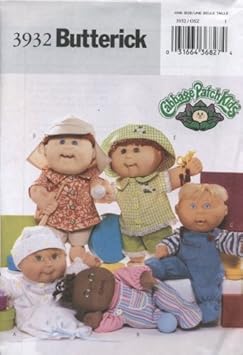
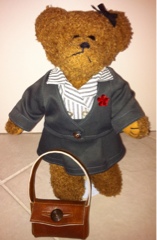
I started with a CPK pattern as a base (Butterick 3932), since one of them already has a peter pan style collar and I hate drafting these from scratch!! Turned out that there was little that needed to be modified in the body, just a little shortening, and the sleeves needed to be made more fitted. Generally, the CPK sleeves are just rectangles, so I added a sleeve head and a bit of length to create a more fitted sleeve. I should have straightened the body a bit - removed the hem curves - but I am NOT doing it again just for that!! It worked so well the first time, I don't think I will tempt fate again!! The trousers were from the same pattern, but made a bit narrower in the side seam and deeper in the crotch. I did actually make a toile to check the fit before cutting into my fabric. I'm so glad I did, or this could have been a "throw-it-in-the-corner-and-never-finish-it" kinda day. But, in a rare show of skill, it actually worked first time!! So here is my final results....

I did not make the bear - he was $1 from the Salvo's. He has a bit of a wonky face! His boots are oversized ones from a Doofles, which I painted black. They help Ted to stand on his own, and look cute too!! Next challenge is a safety helmet.... Hmmmmm......

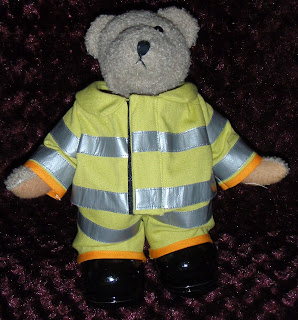
Front, all zipped up
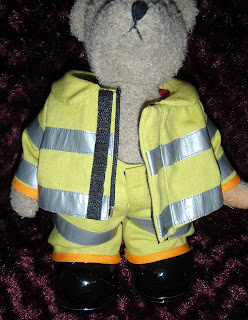
Front, showing velcro flap over zipper
Front with coat open
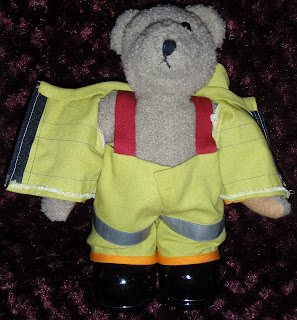
Front fully open, showing trousers and suspenders
Front, trouser opening
Front showing suspenders and hem binding
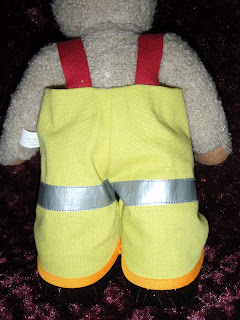
Back, trousers
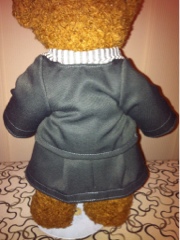
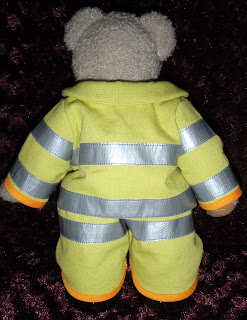
Back, coat and trousers together